Tuesday, October 31, 2023

CARDtober 31 Birthday

This last challenge for CARDtober was to make a birthday card, and the twist was to include something on it that you got for free.

I needed to make a birthday card for a very special little girl who loves cats and dogs, but can't have a either one due to allergies. So she and her brother have pet rats.

On the front, it says, Oh, RATS!!! and the phrase inside continues...."We missed your birthday!" It also says in parentheses, "(But we hope it was a great one!" and our names.

I used pink and yellow because those are her favorite colors. The cat, shaker box, rats and phrase banner are from Queen & Co., and the paw print border die was part of a pet die set that I found at the Tall Mouse booth at GASC or one of the other scrapbook/stamp conventions two or three (or more) years ago.


Monday, October 30, 2023

CARDtober 30 Sets with Flap Closure

This was a fun and easy challenge, except for picking the papers. I finally gave up late last night, and this morning, I chose print & cut papers for the inside patterned strip, and the flap.

The only problem is how to keep the flap closed. I know a lot of people like to use thin button magnets, or velcro dots, but I don't have any velcro handy, and the button magnets are a danger to any child that might pull them off and swallow them.

They stay closed in an envelope, of course, but for the photo, I just rolled a piece of removable tape and stuck it under the flap. It works in a pinch.


Sunday, October 29, 2023

CARtober 29 Vellum Easel Card

This challenge was to create an easel card with a vellum window. The twist was to make it an easel card with a battery operated "candle" to make it shine. I think this is one of my favorites of all the challenges.

I adapted a Silhouette cutting file that was an easel card, then adapted it. There is a white panel that is hidden but shows when the card is fully opened. I have tried to show 4 different views that help display the construction. I also added a sentiment panel, which was supposed to hold the card open for display, but wasn't quite tall enough, so I added pearl stops/anchors to hold the card open properly for the electric "candle" to fit and shine through the vellum.

These first two photos show the card open, with the fake candle (obviously, you would never want to use a real candle).

In these next two photos, the light has been removed, and you can see a little of the easel construction. The white panel helps to support the open easel, as well as providing a place to write a Christmas greeting. However, I would write only on the bottom part of the white panel, to avoid the writing showing through to the Nativity scene.

The card does remain open somewhat, even when folded in the closed position, but it will fold flat enough to get it into an envelope. However, due to the thickness of the card, the Post Office would consider it a package, so I would give it to the recipient personally rather than mail it.


Saturday, October 28, 2023

CARDtober 28 Stencils

I have very few stencils of the type used by card makers today, so I wasn't sure I would be able to do this challenge. However, I decided to look through my dies to see if I could create a stencil with dies. Instead, I found a die with stencil/embossing properties. It was a pain to mask for the inking, but it worked. I used an embossing folder for the background. The twist was to add gems or pearls.


Thursday, October 26, 2023

CARDtober 27 Outside the Box

This will be my last Outside the Box Challenge. I know my challenges have not appealed to everyone, and some may have even found them difficult and discouraging. 

I've been card making for nearly 40 years. I've seen a lot of different cards that were a basic A2, A7, or other rectangle. Perhaps because I have seen a huge number of cards over the years, I came to like cards that are different in some way, whether they are shaped, are dimensional like box cards, or can slide, move, or whatever.

This last card is very different, but it's made with simple, basic tools. It does stand upright. First, I will post a link to the video where I learned to make it:

6x6 Double Tucked Corner Fold Card

Below is my version, which I made using the Graphic 45 St. Nicolas papers & stickers, and a few Silhouette print and cut designs.
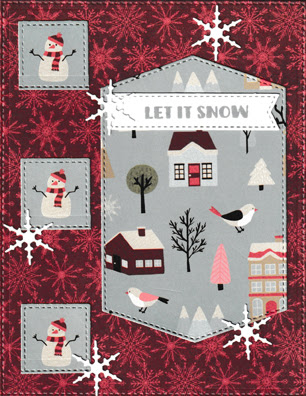
Closed view:

Fully open front view:


And, because you need someplace to write a note or at least sign it, here is the back:


Note, the green behind the card is just to make the card show up better, since my card base is white, and a white edge on a white background can be hard to see the outside edge of the card.

This challenge is to make the fairly easy card shown above using whatever papers and ephemera you have OR if this is too overwhelming, not to your taste, or you need something really easy due to being behind on all the challenges, you have another option: to make a card that opens downward instead of from the side or from the bottom (which is how most cards open). Here is an example of a card that I made using a Silhouette design, which opens at the bottom:


The flip flops are Queen & Co. shakers.The stamped phrase, in case it's hard to read, says, "Flip Flops: the glass slipper of the South."

Either way, I hope one of the above options will be a challenge that you can enjoy.

CARDtober 26 Two for One Ink Blending s/Silhouette

I was trying to create the hint of a sea at sunset scene when I did this. I'm not thrilled with the stamp, since it had more of a grunge look, although it isn't as obvious in the photo. I hadn't noticed that when I bought the stamp. I liked the scene, though. It seemed right for the card.


CARDtober 25 Aqua and Red

Unfortunately, I have no aqua in my stash, so instead of aqua and red, I went with teal and red. All dies, including those that I used to make the flowers. The flower centers are prills from Heartfelt Creations.


Tuesday, October 24, 2023

CARDtober 24 Summer

This challenge was to make a card with a theme that takes place in the summer, and the twist was to use an image that echos the background, or to do some fussy cutting. I did both. These are papers from my stash that I found at Tuesday Morning ages ago. Some members of our family love camping, and I had the papers, so I fussy cut a compass from a cut apart card scrap, since the paper I wanted to use had a compass and other hiking designs. The background paper around the outer edge was the B side of the hiking paper. I popped the compass and the Explore banner.

It was easy and fast. After being out of town two weekends in a row, I have struggled to get caught up on all the CARDtober card challenges posted while I was away, so I appreciated an easy challenge.


CARDtober 23 Vellum Reflection

This challenge was to create a card with a water reflection made by stamping on vellum as well as on card stock. The vellum stamped image is turned over and upside down, and lined up so that it appears to be a reflection. I have a huge collection of stamps, but only one had an opportunity for a water reflection.

I'm not sure I would have chosen to do this one without being prompted, but I love the results.

CARDtober 22 Sets

Actually, this challenge was supposed to be Vellum, but one of the hosts got mixed up on what day to post, and the host for the 22nd needed more time, so it worked for everyone. The twist was to include an extra fold in the card design.

I had some leftover card kits when I did a card making session with the gals at church, so I took a few of the leftovers to use on these cards. The sentiment on the front says, "Got Lemons?" and on the inside, it states, "Life can't be as sweet without a bit of sour." It's one of my favorite sayings.

CARDtober 21 Stencils

This challenge was to use layered stencils. I don't have layered stencils. I thought I might be able to do something with my old brass templates, but I couldn't find where I had put them. It's obviously been a long time since I used them. During my hunt, I did find stencils that I forgot I had. They go back to much earlier days of scrapbooking, when I had young children, but they were stencils. I found one that was intended to be used for layering. It's a bit childish looking (I had young kids and my taste in stencils shows it), but it would work. Sort of. I am obviously not particularly talented at using stencils. Anyway, here is the result:


I'm almost embarrassed to post it, since my tastes have definitely changed over the years, but it meets the challenge.

Thursday, October 19, 2023

CARDtober 20 Pop-Up Hexagon Box Card

Every CARDtober, I do a box card. They are among my favorite kind of 3D cards to do, but since my theme is "Outside the Box," I am doing a little different type. I am linking a video below by the designer, and her video is how I learned to make this type of box card. And the nice thing about it, is that it is super EASY! It's definitely easier than regular box cards. And faster. So here is the one I made. I used a decorative leaf circle die for a little extra decoration, but I didn't color it or anything. It's just plain white.

This is the video link:

https://www.youtube.com/watch?v=aWjBtivSqDA

And here is my version of the hexagon box card:


The blue background is just a piece of card stock I used behind it so the white leaf wreath would show.

CARDtober 19 Two for One

This challenge was to create two cards using the same or similar papers, and the same pattern, which was given, along with a cutting guide. I used older BoBunny papers from the Genevieve collection.


Wednesday, October 18, 2023

Unique Oval Step Card

After I agreed to be a host for CARDtober again, I spent some time browsing Pinterest to see if there were any fun cards there that I wanted to make for one or more of my challenges. I came across an Oval Step Card that was creative and unique. It wasn't called a step card, but that is essentially what it is. I couldn't find out who the card designer was, but it appears that a Dutch Company made a stencil a few years or so ago for the card pattern. Unfortunately, I couldn't see any way to buy it. I did find a photo of the stencil, so I traced it using my Silhouette software. This was a quick and easy Halloween card I made with the pattern. I just embellished it with patterned paper from my stash and added Queen & Co. Halloween Foundation die cuts.


CARDtober 18 Fall Rainbow

This one was a little different. The challenge was to make a fall card with a rainbow, but the rainbow colors were to be fall colors, not the usual spring rainbow colors. I had some cut apart cards that looked adaptable, so I cut them to pieces, and used parts to make this card:


CARDtober 17 Spring theme

This card is supposed to be related to a Spring event, whether an activity or holiday. My mother died in 2001, but I remember the Clematis that she planted, and how it climbed the railing. Clematis will always make me think of her.

I embossed the card base, trying to get it to look a bit like house siding. The window and clematis are from a Heartfelt Creations paper pad/stamp/die set. I used the cut outs from the paper pad and used the matching dies.

Easy. Fast. I'm playing catch up, since we had a major family event last weekend.


Tuesday, October 17, 2023

CARDtober 16 Sets

I made a second set of birthday cards, this time with more feminine colors. I used the same Queen & Co. Foundation dies and decorative dies, and the same set of Q&Co. sketches as I did with the masculine birthday cards.

The sketches that I used are posted in the Queen & Co. Royalty Facebook Group. They were posted for World Card Making Day 2023.

CARDtober 15 Vellum

For this challenge, the vellum was to be used as the background. One of the options was to use it to cover a patterned paper, which is what I did. The twist was to deboss the vellum. Since my vellum seems to crack easily, I just went with white accents instead.


CARDtober 14 Stencils

This challenge was to use stencils with anything other than ink. I used a Pearlescent Embossing Paste. It doesn't show well in the scan, but it is a shimmering pearl effect.

I decided not to add a sentiment at this point, so that it can be a birthday card, thinking of you card, or something else. The pearl looks almost like silver, which fits the twist, to use something metallic.


Thursday, October 12, 2023

CARDtober Challenge #13 Outside the Box Pocket Cards

It is time for another Outside the Box challenge, and this time around, I've chosen Pocket Cards. Instead of the traditional card opening, the card base is a pocket, and the recipient pulls out an insert from the pocket to read the message. 

I found the Picnic Basket Pocket Card on the Silhouette Design Store back in 2019. I was teaching card making to some friends in my home, and this is one of the cards that I helped my friends to make.  After cutting out the pieces, I embossed the lower part of the basket with a basket weave embossing folder. I also embossed the flap of the envelope, and I stamped ants on the front lower right corner of the envelope as well as on the insert to the picnic basket.. This is my favorite Pocket Card to make, and it probably will always be.

I also made two other Pocket Cards recently, specifically for this challenge. I created the pumpkin pocket card with a large pumpkin card die from Queen & Co. I turned it into a pocket by cutting folded card stock, placing the bottom edge of the pumpkin die just beyond the fold, then cutting  it out. I cut a second pumpkin to glue on top to cover the fold. I cut a third pumpkin that I trimmed down to make a skinny pumpkin that would slide inside the pocket.

The Viewmaster pocket card was another Silhouette file. It was the quickest and easiest to make of the three pocket cards.

The challenge is to make a pocket card. Give yourself 5 extra points if it is shaped, but a shaped pocket card isn't required. 

The twist is to decorate the envelope by embossing the envelope flap OR to stamp a small design on the front of the envelope.


CARDtober Challenge #12 Two for One Fun Fold

I made the cards, following the video, but I made a mistake. I was going to redo them, but I'm still working on birthday cards for the gals in my family, too, which I hope I can use for an upcoming Sets challenge.

At some point, I'd like to try to do this Fun Fold again, but today is not that day. I just need to post it and try to get caught up on the CARDtober Challenges so far.

The bottom card looks a little wonky in the photo, but it's actually straight. I do like this Fun Fold, so I will have to play a bit more with it when I try doing it again.

CARDtober Challenge 11 Colors, Least Favorite

This challenge was to make a card using our least favorite color(s). I don't like either brown or orange, although, if I put them together in a fall themed card, I usually like the results. The twist was to pair them with a favorite color to see if we liked the results, but I skipped the twist since I already liked the combination.

Again, older papers. I embellished with Queen & Co. banners, a flower that I made with Heartfelt Creations stamps, dies, colored with inks, and some Nuvo drops. The papers were a cut apart card sheet from a few years back, and although it's not obvious, the card mat is cream colored.


CARDtober Challenge #10 Winter

This challenge was to create a card that was winter or winter holiday themed. I just went with the basic winter. The twist was to create at least one "inchie" (a one inch decorated square, which used to be a trend). I kind of did the minimal for the twist, and this was a relatively easy card to make. I used Wink of Stella on the snowflakes and snowmen, which unfortunately doesn't show in the photo. The paper is from my stash and is at least a few years old.


Tuesday, October 10, 2023

CARDtober Challenge 09 Sets

This challenge was to create at least 3 sets, either using the same papers or the same sayings. The twist was to pop one of the elements. I went with the same papers, and used 3 Birthday sentiments.

Normally I design my own cards, but this time, all I did was to choose the papers, most of which were Queen & Co. papers, since they had a challenge/contest going for World Card Making Day that I had planned to enter. Unfortunately, I didn't finish my cards in time.  Still I am happy with the results, and it helped me to finish them quickly. I plan to give them to the guys in my family. I'll probably be doing the same designs, but with different papers for the gals.

I created 7 cards, based on the 7 card designs in Queen & Co.'s Die Cut Guide #5. It used 6 sheets of coordinating patterned or and plain card stock, which were to be cut with specific Foundation Dies, and then assembled into cards based on Ginger's sketches. I made a mistake or two, as well as a little adaptation, but very little. I loved the results. I added a Birthday die cut and sentiment to each, since I need to boost my stash of birthday cards.


Saturday, October 7, 2023

CARDtober #8 Vellum

This challenge was to make a shaker card, but with vellum in place of acetate. Also, to add images as shaker pieces. I went with one of the new Queen & Co. Endless Halloween Shaker die sets to make my shaker with the spider web, added a spider to the web, and I included more of the spiders inside the shaker. Unfortunately, some of the spiders kind of stuck together once shaken, and all the little orange and black shaker balls stuck together in one place, but that can't be helped.


CARDtober #7 Stencils

I only have a few stencils, and the only one I have used is the one I chose for this challenge. The twist was to use 2 different colors of ink. I just used them for shading the brick, to give it a more natural look.

I shaded the window panes, too.

The bushes are a patterned paper from my stash.

I can't say it's my favorite card, but I am satisfied with the results.


Thursday, October 5, 2023

CARDtober #6 Outside the Box

I am hosting the CARDtober Friday challenges. My theme is "Outside the Box," which means to think differently, unconventionally, or from a new perspective; creative thinking.

Most cards, whether store bought or hand made, are usually a rectangle or a square shape (box like), or sometimes other basic shapes such as an oval or circle. Cards that are different attract attention. 

Shaped cards can be made with dies, electronic cutters, or even just with scissors. 

If you are using one of your larger shaped dies to make a shaped card, make sure that the fold of your card base is a little below one edge of your die, then cut. You will need a separate complete cut of one layer of card stock to cover your base card shape, whatever shape you use.

I chose a teapot card, which was a card design that I downloaded from the Silhouette Design Store. It's Design #296773 by Lori Whitlock. I used Graphic 45 Cafe Parisian Collection papers, and fussy cut the roses and pastries from a couple of the sheets to enhance the teapot and teacup. I also popped one of the roses on the front of the card.

Today's challenge is to make a shaped card, anything that is NOT rectangle, square, or other basic shape. Try to get creative.

The twist is to fussy cut part of the decorations on the card. 

Have fun with this challenge. I'm looking forward to seeing your creations!


CARDtober #5 2 for 1

This challenge was based on Crafty Al's Sheetload of Cards for April 2021. I adapted. I have a ton of scraps, and I was having a hard time finding any paper that I liked both the A and B sides. I found one among my scraps, but ended up deciding that the bat side of the paper looked best as the small vertical panel rather than as the main background, so I did both cards the same.

I'm not on a team, so the points don't matter to me. I do CARDtober because it's fun, and I enjoy it. I adapt when I feel like it.

The stamp is from Stampendous, and is a very, very old one from my stash. The little witch is a Silhouette print and cut.

I finished the above cards yesterday. While I'm not doing this for points, so I feel that I can adapt as needed, part of me really wanted to do the challenge as it was given. So today, I found other papers that worked better. I even got the tag correct this time. The jar of flowers is a print and cut from Silhouette Design Store. The papers are from Imaginisce 2012. I don't know who makes the stamp I used for the phrase on the tag.


Wednesday, October 4, 2023

CARDtober #4 Colors

Today's CARDtober challenge is to use the colors red, white, and grey and/or silver. I had a Christmas paper in my stash from Little Yellow Bicycle, left over from a 25 sheet pack find at Tuesday Morning years ago. It was a bright, shiny red, silver, a little gold, and had white accents. I used that for my card base. I used the Christmas Tree die from Queen & Co.'s Jolly Jingles shaker set, and one of their 3D bows, but I'm not sure which set that was from. The silver cardstock was a matte grey on one side, so I pieced the bow to show only the silver (as much as I could), and I used clear Wink of Stella on the little bit of matte side that showed. The ovals for the Noel sentiment were cut with dies from Q&Co.'s Foundation 5 set.

The Noel stamp was from a "free" set that came with an issue of Cardmaking & Papercraft. It's not the best quality stamp, but I liked the design, it was the right size, and it stamped okay.

CARDtober #3 Fall

This challenge was to make a fall themed card, having to do with some event that takes place during the fall. I chose Thanksgiving, and I used a few different Silhouette print and cut files for all but the card stock base of the card. The Turkey is a Stinkin' Cute Paper Piecings file, the pie wedge is from La La Shiba, and the banner is from Carta Bella.

The Twist was to either pop something on the card, or to use AI to create an element for the card. I chose to pop the body of the turkey for a bit of dimension. I printed two turkeys, and hand cut the body separate from the feathers from one of the cuts, then used foam tape to adhere it in front of the full print & cut turkey.


CARDtober #2 Sets

This challenge was to create a set of 3 cards, either using the same sentiment or the same papers. I went with the same sentiment, although I used 3 different "Thinking of You" stamps. I used papers from the Heartfelt Creations Climbing Clematis paper pad, just different papers from the collection for each card, but they at least coordinate. I used Queen & Co. Foundation dies to cut the banner accents.


Sunday, October 1, 2023

CARDtober #1 Vellum

Yes, it's been awhile since I posted. I have been crafting, including making cards, but taking time to post my projects has been challenging. I did a bit more vinyl designs on clothing. I made Captain America shirts, and Mandalorian shoes. I made a Loki hat for a family member, and Captain America shirts for another family member (it was her design that I used to make the ones for my husband and me). We had a family reunion in Disneyland/California Adventure, and it was a lot of fun! My husband and I took our ECVs with us on the plane for the first time. It was great, but then I got sick after coming back, although not as bad as when we went to Disney World and got hit by Hurricane Ian.

Anyway, I'll try to post pictures of the projects I've made eventually, but right now, it's the start of CARDtober 2023, and I am one of the hosts. AZ Crafty posted a vellum card base challenge for the first one, so this is the first card:


We were supposed to emboss the vellum front. My embossing folders kept tearing my vellum, so I finally went with a daintier embossing design. I used a Silhouette print and cut for the front, and although you can't really see it, I added tiny gems, and applied Wink of Stella to the ornaments and other tree decorations. I added the glitter holly at the corners. Inside the card, I added a blank cutout behind the tree on the inside front of the card, so you wouldn't see the adhesive, and another blank cutout on the inside back, with a stamped image. It went together quickly, and it looks nicer in person.

I will also be one of the CARDtober Challenge hosts, but I won't be posting my first challenge till Thursday evening.

Followers